Welcome to our comprehensive article on “Why DIYing Your Mini Split AC Can Be A Risky Undertaking”. As your trusted HVAC experts, we believe in empowering our readers with reliable, fact-based information before they make any decisions regarding their home’s comfort systems. This post aims to educate you on the potential risks and pitfalls that could occur if you decide to install your mini split AC system yourself, highlighting why professional assistance is often a safer, more efficient choice. The knowledge shared here will equip you with the necessary understanding to make an informed decision, ensuring your home’s cooling and your family’s safety. So, let’s delve into the topic and explore why this DIY project might be one to avoid.
Understanding Mini Split AC Systems
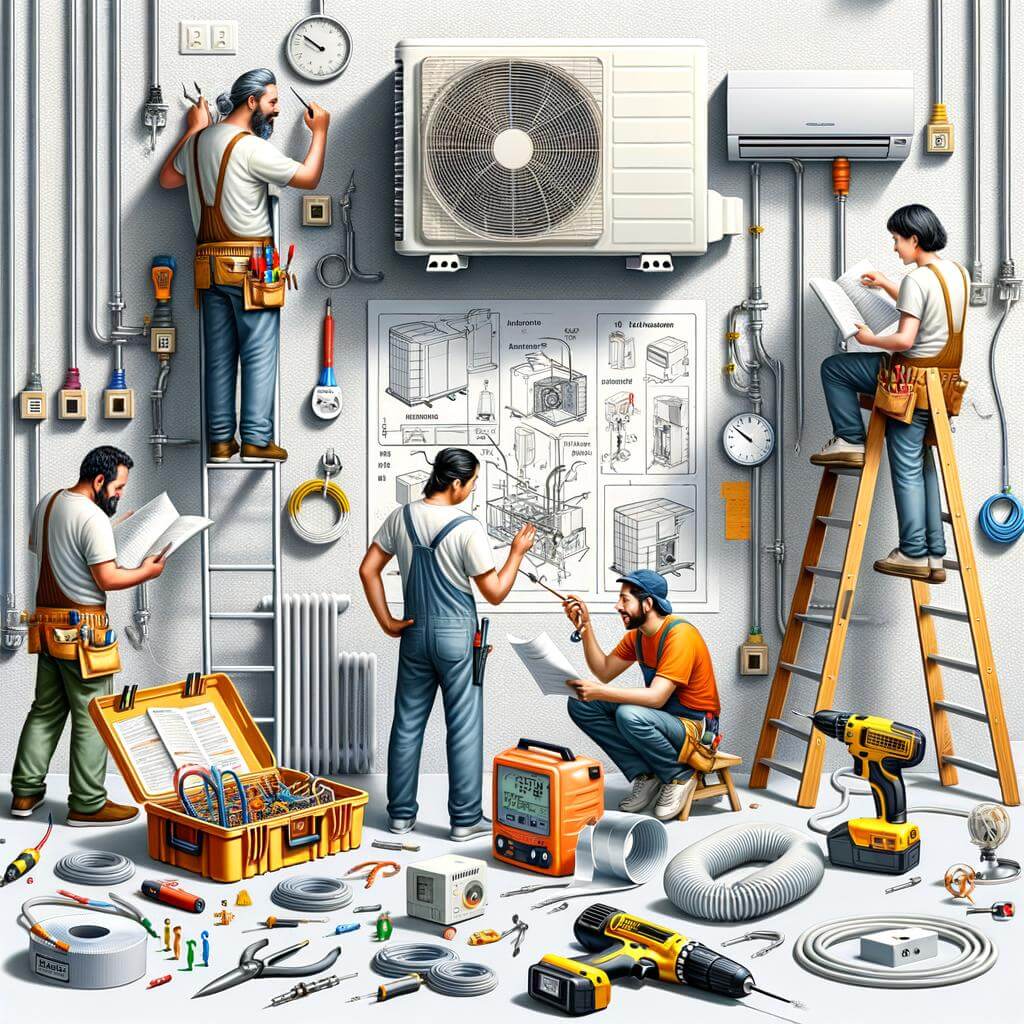
To get a basic understanding, let’s break down what a mini-split AC system is and how it functions. Essentially a mini-split AC system, also known as a ductless system, is designed for cooling individual rooms within your home. The system includes two fundamental components, an outdoor condenser and an indoor air-handling unit, connected through a conduit. Unlike traditional ACs, mini-split AC systems offer flexibility, energy efficiency, and precise temperature control.
ComponentFunction
Outdoor Condenser
Expels heat from refrigerant and sends it back indoors
Indoor Air-handling unit
Delivers the cooled air into the room
Imagine the situations when you might find the idea of DIYing your mini-split AC system tempting: maybe your unit isn’t cooling properly, or there’s a leak, or perhaps you’re considering an entirely new installation. However, despite the potential savings, deciding to DIY your mini-split AC system could be a risky undertaking fraught with numerous challenges.
Technical Knowledge: AC systems are complex with interconnected components that require comprehensive understanding. Unless you have the technical knowledge, it’s difficult to diagnose and safely resolve mechanical or electrical issues.
Safety Concerns: Working with electrical systems can be pretty dangerous if not done correctly, posing the risk of electrocution. Additionally, mishandling refrigerant can lead to health hazards.
Voiding Warranty: Any DIY work on your unit might void the manufacturer’s warranty, leaving you uncovered for any repairs or replacement parts down the line.
Those are just a few possible pitfalls that could turn your cost-saving DIY project into a colossal headache. Hence, it is recommended to let professionals handle your mini-split AC system challenges where they can leverage their experience and tools to ensure safe and efficient work.
Potential Risks Involved in Do-It-Yourself Mini Split AC Installation
One key area of concern when installing a mini split AC system on your own is the potential dangerous mishaps that could occur. Handling high-voltage electrical connections without proper knowledge could potentially lead to electric shocks or even cause short circuits. Equally alarming, dealing with refrigerants like Freon improperly can risk exposure to the highly toxic, environmentally harmful substance. Additionally, a slight miscalculation when drilling holes for mounting could result in structural damage to your property or even personal injury.
Here are the potential risks involved:
Physical injuries: During installation, one can easily get cut or bruised by the sharp components of the system if not careful.
Improper installation: Without the necessary know-how, one is likely to make mistakes that could affect the performance of the system and eventually its lifespan.
Voided warranty: Many manufacturers only honor warranties if installation is performed by a certified technician.
Increased energy bill: An incorrectly installed mini split AC can be inefficient and consume more energy resulting in higher electricity bills.
Besides the risk factors, failure to comply with relevant codes and regulations may result in fines or penalties. Here’s a simple comparison between DIY and professional installation:
DIY Installation
Professional Installation
Potential mishaps and accidents
Qualified and trained professionals
Possible warranty void
Factory warranty remains intact
Inefficient energy consumption
Optimal energy consumption
No conformity to codes and regulations
Complies with all codes and regulations
In a nutshell, installing a mini split AC isn’t a simple do-it-yourself project. It may seem as an attractive way to save money initially, but the potential risks are high. Considering the risks associated and the probable cost of fixing a faulty installation later, it is advisable to hire a professional technician for the job.
Detailing the Technical Challenges in DIY Mini Split AC Setup
The installation process is the first obstacle in a DIY mini split AC setup. Their complexity often levels up many home projects, requiring technical knowledge and tools not typically found in the average DIYer’s toolbox. Understanding electrical systems, recognizing appropriate wire and circuit sizes, as well as refrigerant management, are critical in ensuring a proper installation. Proper positioning for efficient performance, avoiding leaks, and guaranteeing good drainage are also crucial aspects that can make or break the appliance’s successful setup.
Electrical Complications: Despite looking as simple as plugging in a cable, powering mini split AC systems is anything but trivial. It requires considerable electrical knowledge to ensure the circuits and wiring are well-suited to power your appliance without problem or danger. An incorrect wiring setup can result not only in an underperforming machine but also a serious electrical problem. Refrigerant Management: Apart from electrical considerations, correctly handling the refrigerant during installation is key to a good working AC. Lack of knowledge or care in this area can result in either leaks, decreased efficiency, or even damage to the device. Furthermore, environmental laws require proper handling and disposal of refrigerants. Physical Installation: Installing the indoor and outdoor units requires precision, balancing, and knowledge of exterior siding, drilling through walls, and aesthetics. Poor installations can lead to leaks, noise issues, poor performance, and damage to your home’s aesthetic.
Problem Area
Possible Negative Impact
Incorrect Electrical Setup
Underperformance, electrical issues.
Improper Refrigerant Handling
Leaks, decreased efficiency, damage to device and environment.
Poor Physical Installation
Leaks, noise, poor performance, damage to home.
Understanding these complexities, it becomes clear that a seemingly simple DIY project can quickly morph into a risky and costly affair when mini split AC installations are involved. It is important to weigh the potential cost of mistakes against the perceived savings of a DIY installation.
Why Professional Installation Ensures Your Mini Split AC Works Efficiently
When it comes to installing your mini split AC, many individuals may be tempted to attempt this task on their own, thinking they could save some money. However, DIYing your mini split AC installation can prove to be a risky venture. The efficient operation and long-term health of the unit can be compromised, increasing the likelihood of persistent faults and malfunctions, fast wear and tear, and higher energy bills.
Professional installation ensures that your mini split AC system will work more efficiently. Professionals have the necessary training, knowledge and expertise to install the AC unit correctly the first time around. They would ensure the correct size for your home and optimal placement for sufficient airflow and alleviate common issues such as refrigerant leaks, electrical problems, or inefficient cooling. Here are some key reasons why professional installation is crucial:
Correct Installation: Professionals ensure that all components are installed perfectly, reducing the risk of malfunctions and improving the unit’s efficiency.
Right Tools: Professionals have the right tools for the job, which help in precise and safe installation.
Precise Sizing: Professionals know how to accurately determine the right size of the mini split AC that’s suitable for your space, avoiding oversized or undersized units which can cause inefficiency.
Warranty Protection: DIY installation may void the warranty of your unit, but this won’t be an issue with a professional installation.
DIY Installation
Professional Installation
Efficiency
Potentially compromised
Optimized
Warranty
Potentially voided
Protected
Risk of Malfunctions
High
Reduced
Long-Term Costs
Potentially higher
Typically lower
In conclusion, while installing a mini split AC yourself might seem like a cost-saving endeavor, it can result in more expenses in the long run due to the risk of improper installation and potential malfunctions. Opting for a professional installation can give you peace of mind knowing your AC unit is running as efficiently, cost-effectively, and reliably as possible.
Avoiding Costly Mistakes: The Importance of Expert Advice in AC Installations
When it comes to managing your home’s comfort, the decision to purchase a mini split AC can be rewarding in the long run, offering both energy efficiency and easy customization. However, the installation process can prove to be a rather complex task, especially for DIY enthusiasts. Attempting to install the device without professional help can result in a number or problems; many of which you may not recognize until it’s too late.
Proper sizing and correct placement of the mini split AC is a technical task requiring expert analysis. An improperly sized unit can result in energy inefficiencies while incorrect placement can lead to sub-optimal cooling or heating, affecting your comfort. This means, expert advice is essential to avoid common, yet expensive pitfalls.
Incorrect installation can also result in poor system performance and shorten the lifespan of the unit. The complexities involved in the process, from understanding electrical requirements and clearance needs, to managing refrigerant levels, all demand the expertise of an HVAC professional.
Furthermore, installing a mini split AC requires adherence to specific manufacturer guidelines and local codes. Understanding and properly implementing these rules and guidelines cannot be undervalued.
When we consider the potential consequences, the importance of expert advice in installing a mini split AC becomes clear. After all, taking a risk can be costly, not only in terms of money but comfort and safety as well. So why not save yourself the trouble and hire a skilled and certified HVAC technician for the job?
Situation
RISK
RESULT
Improper Sizing
Energy Inefficiency
Higher Energy Bills
Incorrect Installation
Poor System Performance
Early Replacement Costs
Remember, going the DIY route may seem cost-effective initially, but can potentially lead to mounting expenses in the long run. Let the experts take care of your AC installation needs. They can provide you with reliable services and peace of mind, making your comfort a true investment.
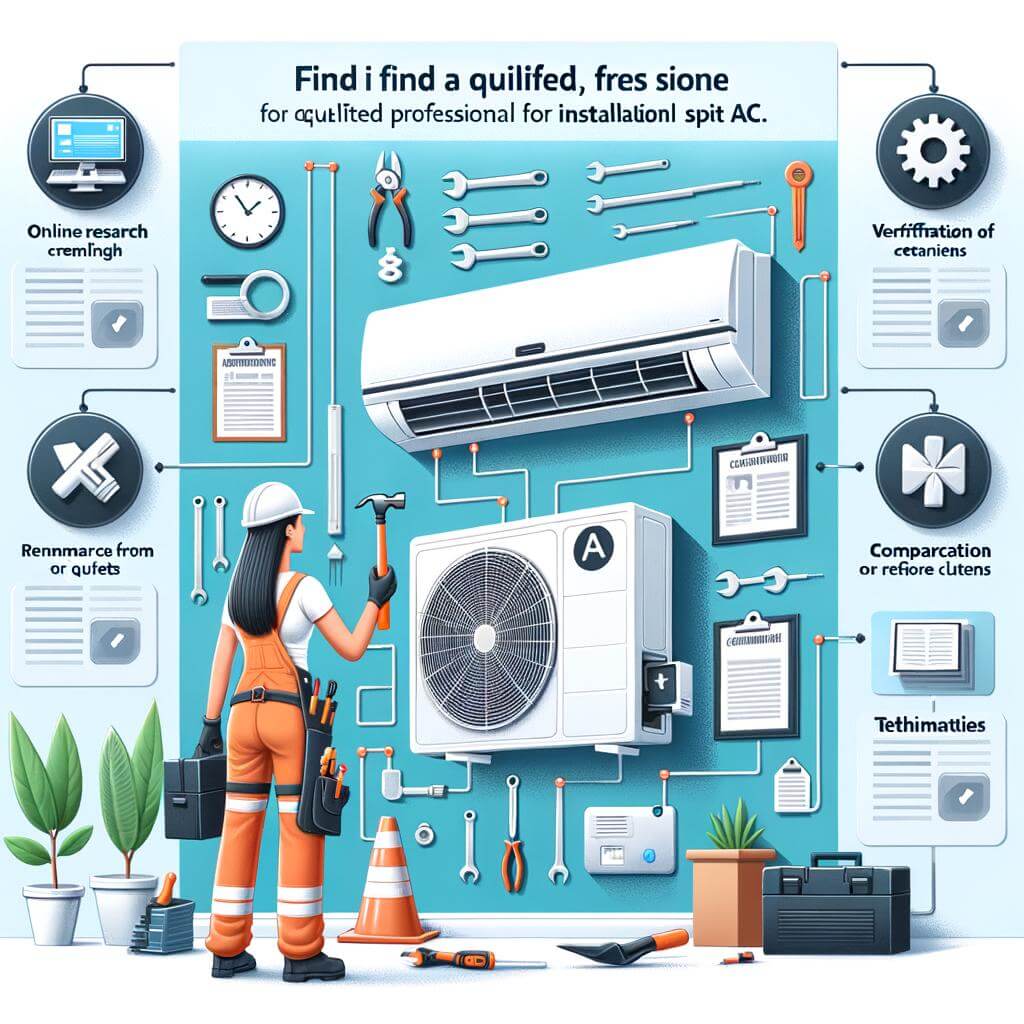
Tips for Finding Qualified HVAC Professionals for your Mini Split AC Installation
While the idea of installing a mini split AC on your own can be tempting, the process comes with several risks that are best avoided. Having a skilled HVAC professional handle the installation can guarantee efficiency and correct execution. Here are some ways you can secure the right professionals for your mini split AC installation.
Seek For Referrals: By asking friends, relatives, or neighbors about their experiences with HVAC professionals, you can get direct and trusted feedback. Also, online platforms offer reviews and ratings of nearby HVAC contractors. Trustworthy contractors often have positive reviews and high ratings. Look for consistent, positive feedback over a period of time.
Check For Credentials: The contractor you choose should be licensed, bonded, and insured. This is to ensure that you’re not legally or financially responsible if a worker is injured on your job. In addition, they should be certified by respected HVAC institutions such as North American Technician Excellence (NATE).
If you take a moment to carefully research and select an HVAC professional, you can save a lot of time, money, and stress down the line. Undeniably, the benefits of hiring a qualified HVAC professional for your mini split AC installation outweigh the risks tied to DIY installation.
Advantages
Risks
Professional and efficient installation
Potential damage from incorrect installation
Full insurance coverage
Possible personal, legal, and financial liabilities
Warranty protection
No guarantee if something goes wrong
Peace of mind
Time consuming and stressful
Essentially, finding the right professional help to install your mini split AC not only ensures a precise and risk-free operation but also helps in maintaining its efficiency in the long run. Remember that correct installation plays a crucial part in the lifespan and performance of your AC system.
Insights and Conclusions
As we wrap up this exploration into the potential risks of a DIY approach to installing a mini split AC, we encourage all homeowners to take caution and consider professional consultation. Installing a mini-split AC is a complex process that involves dealing with electrics and refrigerants, and any mishap can lead to costly damages or personal injury. Besides the risks, DIY installation can void your warranty, leaving you to bear the cost of any defects or malfunctions.
So, before diving headlong into a DIY project with your mini-split AC, be sure to weigh the potential risks and rewards. Remember that sometimes hiring a professional upfront can save you from future headaches and expenses. Reach out to knowledgeable experts for installation, rely on experienced technicians for advisement, and always prioritize safety over cost-saving. Guided by the details shared in this article, we hope you can now make an informed decision. Always remember – learning to do it yourself doesn’t mean having to do it all by yourself. Stay safe!
Welcome to our informational post. “Hydro Jetting: The Expert-Recommended Solution for Sewer Lines” provides valuable insights into an efficient and effective solution for maintaining and dealing with sewer lines. Our trusted experts have combined their knowledge and experience to guide you on this subject. The facts outlined here will educate you about the importance and benefits of hydro jetting. So, if you’ve been dealing with persistent sewer line issues or you’re just looking for a robust solution for preventative maintenance, this post is perfect for you! Reading this post will arm you with the essential information to make informed decisions, ensuring your sewer lines work efficiently and uninterrupted for an extended period.
Understanding Hydro Jetting and Its Importance in Sewer Line Maintenance
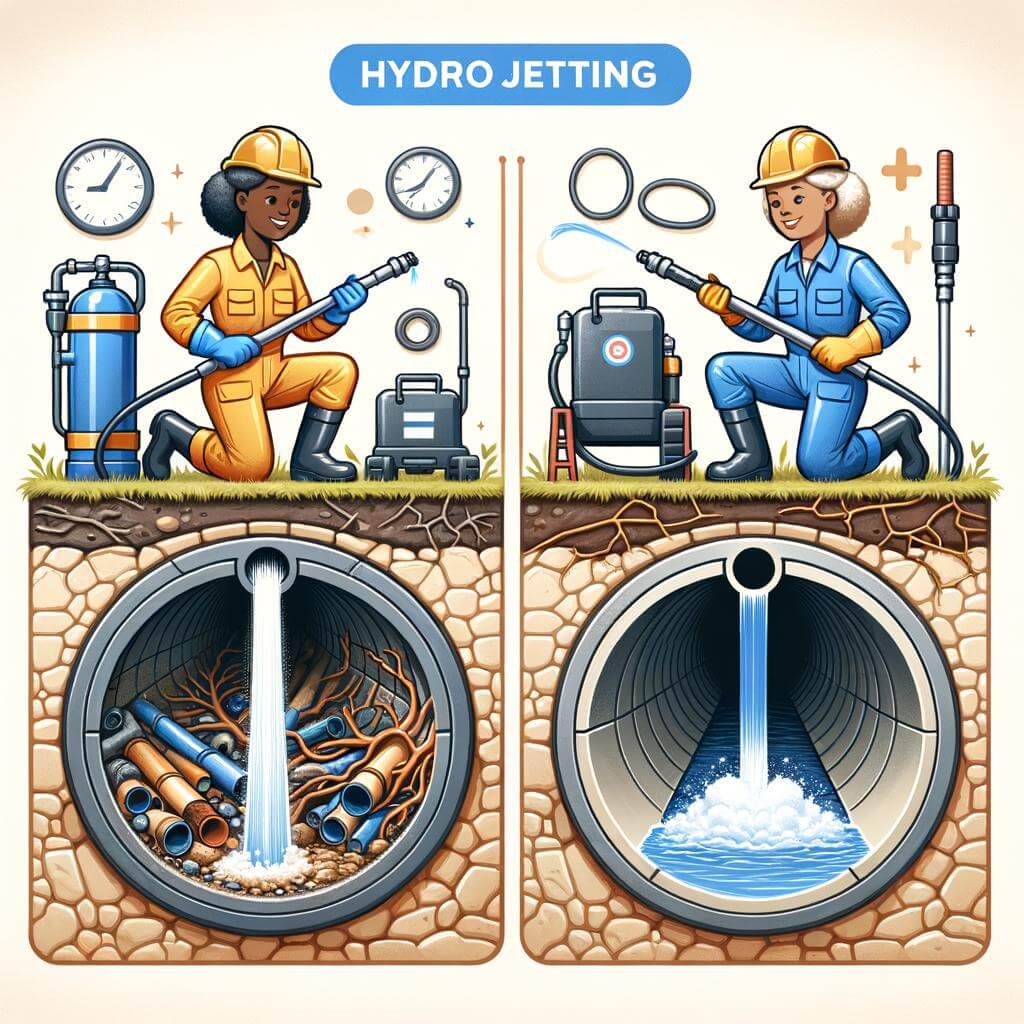
Hydro jetting, an innovative solution to the hassle of blocked sewer lines, is nothing short of a plumbing revolution. Essentially, hydro jetting uses high-pressure water blasted down your pipes to clear debris and gunk that accumulates with usage. Unlike traditional methods of sewer maintenance that involve digging up your yard or even snaking, hydro jetting is non-invasive and more thorough. The high pressure water is capable of handling even the toughest blockages from grease, sludge, invasive tree roots to scale and soap build-up.
Although the method might seem aggressive for your pipes, it is actually safe when conducted by professional plumbers. Yes, high-pressure water is indeed used, but plumbers are equipped with the skills and knowledge to control the pressure and ensure that it effectively cleans the sewer lines without damaging them. It’s also environmentally friendly, as it doesn’t involve harmful chemicals. Plus, by preventing future clogs, it can save you from costly repairs.
Non-invasive method: No need for digging up your yard!
Powerful cleaning: The high-pressure water can handle even the toughest blockages.
Safe for your pipes: Conducted by knowledgeable professionals who can control the pressure to prevent any damage.
Environmentally friendly: Doesn’t involve any toxic chemicals.
Type of blockage
Effectiveness of hydro jetting
Grease and sludge
Highly effective
Tree roots
Can break up and wash away
Scale and soap build-up
Efficiently removes
In essence, understanding hydro jetting can greatly benefit you in maintaining your sewer lines. With this ingenious method, plumbing has indeed taken a giant leap forward towards efficiency and convenience.
The Unmatched Benefits of Hydro Jetting for Sewer Line Unclogging
Sewer line blockages can be a messy and complex issue to deal with in households or in business. Hydro Jetting, an expert-recommended solution, serves as a promising way to address these pesky problems. This technology utilizes high-pressure water to remove debris and build-up in sewer lines, making it an environmentally safe and highly effective method of sewage line unclogging.
What sets hydro jetting apart from traditional methods are its unmatched benefits. Firstly, hydro jetting provides a thorough clean. Unlike traditional rootering methods which might leave some build-up behind, the high pressure jet of water ensures nothing is left behind. It not only eliminates the immediate blockage but also scrubs away any grime or grease lining the pipe walls ensuring a future free from blockages.
Effective on all types of clogs: Hydro jetting has proven to be useful in removing all sorts of blockages including tree roots, sturdy build-ups, and stubborn materials.
Cost-effective: By thoroughly clearing the line, future clogs are prevented thereby diminishing the necessity for frequent pipe cleaning, thus saving money in the long run.
Environmentally friendly: Hydro jetting doesn’t require any harmful chemicals, making it a ‘green’ option for sewer line cleaning.
Method
Cleaning Thoroughness
Cost-effectiveness
Environmentally Friendly
Hydro Jetting
High
High
Yes
Traditional Methods
Medium
Low
No
Experts stand behind hydro jetting for its superior performance. It’s not just a measure to fix an existing problem, but acts as preventive maintenance for your sewer lines. Consulting with a plumbing professional is recommended for the effective application of this method.
Hydro Jetting vs Traditional Methods: Why the Experts Recommend the Former
Despite its many advantages, hydro jetting is often overlooked in favour of traditional sewer cleaning methods. Hydro jetting uses high-pressure water to clean out sewer lines, while traditional methods typically involve a mechanical snake or a drain auger to remove blockages. These methods might seem similar on the surface, but a closer look reveals significant differences in efficiency, effectiveness, and long-term impact.
The key advantage of hydro jetting is that it cleans more comprehensively. Traditional methods will break up a blockage, but a significant amount of residue can be left behind. Over time, this residue accumulates and forms a new blockage. In contrast, hydro jetting virtually eliminates all residue, which significantly reduces the likelihood of future blockages. It is also worth noting the environmental advantage of hydro jetting. This method uses only water, making it a more eco-friendly option compared to traditional methods that might entail the use of harsh chemicals.
Method
Effectiveness
Eco-friendliness
Hydro Jetting
High, leaves minimal residue
Yes, uses only water
Traditional
Moderate, leaves residue
No, can use chemicals
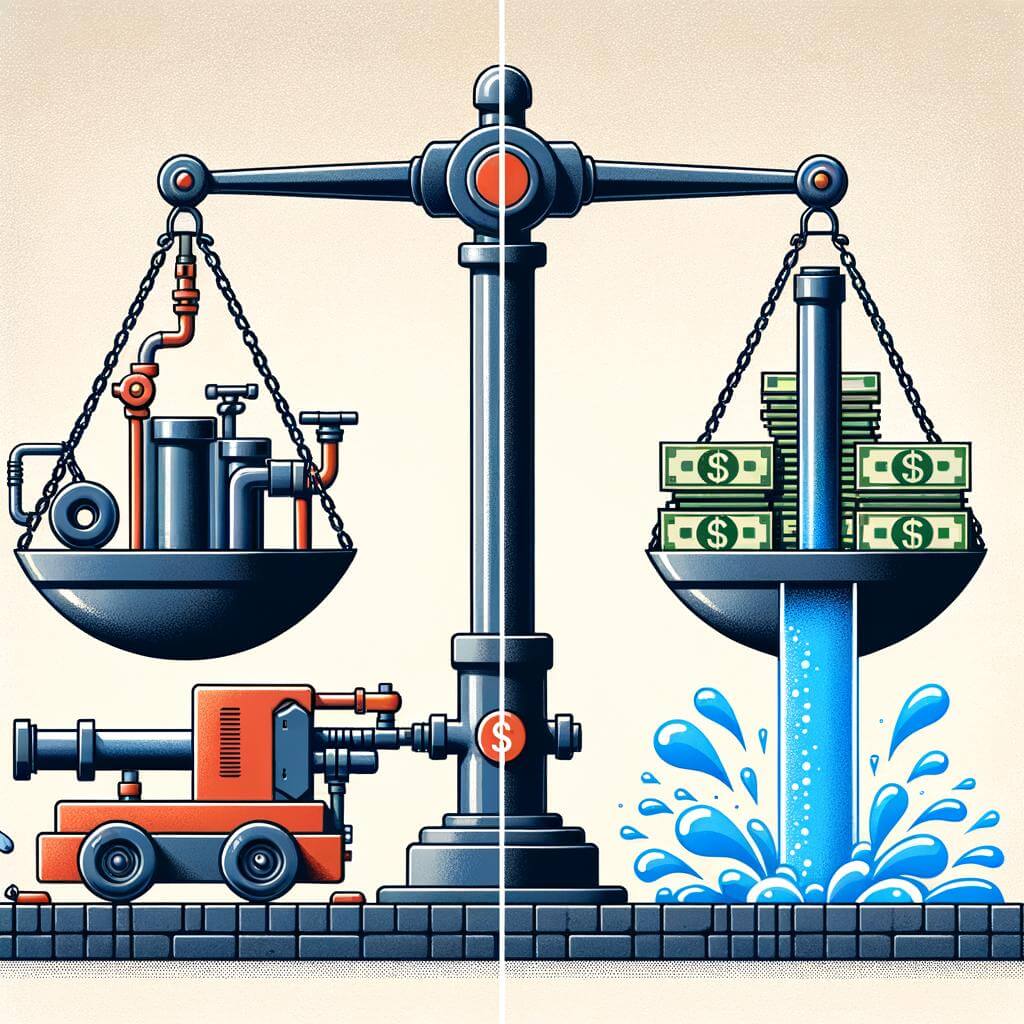
Moreover, it is worth considering the long-term cost-effectiveness. While hydro jetting might be more expensive upfront, it can save you money in the long term due to its comprehensive cleaning capability. This means less frequent need for treatments and lower likelihood of pricey sewer line replacements.
The expert consensus strongly favours hydro jetting. Professionals in the field highly recommend this method for its efficacy, eco-friendliness, and long-term cost-effectiveness. Thus, it might be time to re-evaluate your sewer maintenance strategy and consider adopting this increasingly popular and beneficial solution.
Efficacy: Hydro jetting is more effective at removing blockages and leaves less residue.
Eco-friendliness: Uses only water, with no need for harmful chemicals.
Cost-effectiveness: Despite higher upfront cost, hydro jetting can save money in the long run due to less frequent treatments and reduced likelihood of sewer line replacements.
Advisory Insights: When is the Right Time to Opt for Hydro Jetting?
In the realm of maintaining residential and commercial sewer lines, there comes a situation when conventional methods like snaking or chemical treatments no longer prove to be effective. This is especially true for stubborn blockages caused by tree roots or years-old sediment build-ups. That’s exactly where a professional hydro jetting service comes in handy. This methodology leverages the power of high-pressure water, capable of dislodging anything unfortunate enough to clog your pipes. But, the million-dollar question that haunts most homeowners and business proprietors alike is: When is the perfect time to opt for hydro jetting?
The first and foremost advice here is to seek the help of a qualified plumber who can inspect your system with a camera to check for any serious build-up or underlying issue. Some key signals indicating the need for hydro jetting include recurring blockages, slowing drains, peculiar odors emanating from your plumbing system, and sewage backup. Also, if your property is surrounded by large trees, chances are their roots could penetrate your sewer lines and cause significant issues.
Recurring blockages: Frequent blockages, even after regular snaking or use of chemicals, can indicate a larger, more stubborn issue that hydro jetting can solve.
Slowing drains: This could be a symptom of a significant buildup in your pipes and might need more powerful clearance methods like hydro jetting.
Unusual odors: Foul smells can indicate the presence of excessive pipe waste which could be cleared with hydro jetting.
Sewage backup: This is perhaps the most definitive sign that you need hydro jetting. Sewage backups are major health hazards and need to be addressed immediately.
Equally essential is to recognize that hydro jetting is potent, but it’s not a one-size-fits-all solution. It’s primarily recommended for sturdy pipes that can withstand the pressure. Therefore, aging or fragile pipe systems might require more careful treatment. In any scenario, a professional’s opinion is crucial.
Safety Measures and Professional Recommendations for Effective Hydro Jetting
When embarking upon a hydro jetting project, the importance of safety measures and professional recommendations can’t be overstated. The power of hydro jetting can efficiently clear sewer lines, but operating such high-pressure water jets must be done with a keen focus on safe practices to prevent potential injury or further pipe damage.
Firstly, high-quality personal protective equipment (PPE) is non-negotiable. This includes waterproof gloves, safety glasses and sturdy footwear to safeguard against possible water trajectory or any dislodged debris. Secondly, operating the hydro jetting equipment should be managed by a trained professional or under their supervision to ensure correct pressure levels are used. Lastly, any nearby individuals should be warned ahead of time, and safety zones established if necessary, to keep them safe from any potential harm.
Regarding professional recommendations, experts advise thorough inspection of the sewer lines using video inspection tools before conducting any hydro jetting. This early assessment can identify any pre-existing structural issues within the pipes that may be exacerbated by the power of hydro jetting, ensuring a problem isn’t unnecessarily worsened by the remedy. Additionally, routine maintenance through planned hydro jetting sessions could prevent significant blockages and extend the lifespan of your sewer system.
Recommendation
Rational
PPE Usage
Prevent potential injuries
Trained Supervision
Correct and safe equipment operation
Warning Bystanders
Keep everyone around safe during procedures
Pre-Jetting Inspection
Identify pre-existing pipe issues
Routine Maintenance
Prevent severe blockages and increase sewer system lifespan
To ensure maximum effectiveness and safety, this guide offers optimal resource points. Don’t underestimate the power of hydro jetting and always use professional supervision when needed. If utilized properly, hydro jetting can be an efficient and effective solution for maintaining clear sewer lines.
Evaluating the Cost-Benefit Analysis: Is Hydro Jetting Worth the Investment?
The Big Picture: Costs and Benefits
When weighing up the investment in hydro jetting for your sewer lines, it’s essential to consider both the costs and benefits.
The primary cost involved in hydro jetting lies in the initial outlay for equipment and labour. Skilled plumbers typically charge by the hour, and a significant job may require several hours or team members to complete. Furthermore, the high-pressure water jetting equipment itself is not cheap, often commanding several thousand dollars for a professional-grade model.
Long-term Benefits Outweigh Initial Costs
However, this initial cost can be offset by the numerous benefits the process offers. For starters, hydro jetting is an incredibly efficient method for clearing obstructions from your sewer lines; in many cases, it can succeed where traditional snaking methods fail. As a result, you might save time, resources and further damage by opting for a hydro jetting solution in the first instance.
Additionally, hydro jetting is an environmentally friendly solution, relying only on the power of water and requiring no harsh chemicals. This reduces harm to the environment, as well as potential health risks to you and your family. If you equate this benefit to potential savings in post-treatment costs and environmental fines, the financial picture might look more favorable.
Finally, remember that preventive maintenance can circumvent significant problems down the line. Regular hydro jetting to maintain clear, functioning sewer lines can prevent extensive damage, avoiding costly repairs in the long run.
Cost Considerations
Benefit Highlights
Initial equipment cost
Highly efficient cleaning
Labour costs
No harmful chemicals
Requires trained professionals
Preventive care saves future costs
Overall, while the initial cost of hydro jetting may seem high, the long-term savings and benefits render the process a viable and worthwhile investment for maintaining your sewer lines. Always consult with your plumber or sewage technician to fully understand your specific requirements and budget.
To Wrap It Up
In summing up, hydro jetting comes highly recommended by professionals as an efficient, effective, and environmentally-friendly approach to cleaning sewer lines and ensuring continuous, problem-free drainage. It blasts away years of accumulated waste and blockages, upgrading the performance of your plumbing system while minimizing the need for future repairs. As we strive to embrace better practices, it’s essential to weigh the advantages and perks of such long-term solutions. It’s then no surprise that hydro jetting becomes an attractive choice for homeowners, businesses, and municipalities alike. Remember, it’s always best to consult with a reliable plumbing professional to assess if hydro jetting is a risk-free and viable option for your specific situation. Opting for expert-guided solutions can save you from costly drains on your finances and time, so choose wisely. Knowledge is—and always will be—your most potent tool in maintaining a well-functioning sewage system.
Welcome to “Mastering DIY: Expert’s Guide to Central AC Replacement”. This comprehensive guide aims to help all DIY enthusiasts navigate the challenging yet fulfilling world of replacing a central AC system. Packed with the expert opinion, latest facts and useful tips, this post will not only provide you with top-notch information but it will also empower you to perform the work yourself with confidence. It will guide you with easy-to-follow steps from identifying if your AC system requires replacement, to selecting the ideal central AC for your needs, as well as the proper techniques for installation. So, don’t hesitate to delve into our post, you are about to elevate your DIY skills to a whole new level.
Understanding the Basics of a Central AC System
Before diving into the technicalities of central AC replacement, gaining a basic understanding of a central AC system is crucial. The principal components of any central air conditioning system include an evaporator, condenser, and compressor. The evaporator absorbs heat from the air, The condenser ejects heat, and the compressor moves refrigerant between the two coils to carry out the heat transfer process. These components functionally break down the heat in your home or office and transform it into cool, comfortable air.
An average central AC unit should last for about 15 to 20 years. However, the quality of installation, usage, maintenance, and the climate can substantially influence this timeline. If your unit is around this age bracket, and you are frequently calling for repairs, then AC replacement is a thought worth considering. Remember, the life expectancy of an AC unit is not the only factor to judge whether it needs replacement or not. A newer model will also provide better energy efficiency, thus lowering your bills. Be it a residential or a commercial setting; significant savings can be realized over time.
Components
Function
Evaporator
Absorbs heat from air
Condenser
Releases heat to outdoor
Compressor
Moves refrigerant to transfer heat
Regular maintenance is key: An annual servicing by a professional can increase the lifespan of your system.
Choose the right AC size: An appropriately sized system, neither too big nor too small, is essential for efficiency and comfort.
Don’t ignore minor issues: Ignoring small problems might turn them into expensive repairs or even necessitate an AC replacement.
Necessary Tools and Materials for AC Replacement
In order to do-it-yourself when it comes to replacing your central AC, you’ll need to gather a few specialized tools and materials. From safety equipment to maintenance materials, these are your must-haves:
Safety glasses and gloves: Protecting your eyes and hands is crucial when working with heavy machinery and electrical components.
A set of screwdrivers: A variety of sizes and types will come in handy. Make sure you have both flat-head and Phillips-head varieties on hand.
A range of wrenches: An adjustable wrench can be particularly useful for this type of project, as can a pipe wrench.
A multimeter: This device measures electrical properties like voltage and resistance, which can be incredibly useful when you’re dealing with the electrical components of an AC unit.
A pipe cutter: If you need to cut any pipes or tubes, this tool will make the task much easier and safer.
Insulation foam and tape: These will help you to seal the AC unit and ensure that it’s energy-efficient.
Material
Function
Replacement AC Unit
This is the primary item that you will be installing. Make sure to get a central AC model that suits your home’s needs.
Sealants
Used for sealing open spaces and ensure no air escapes or leaks from the system.
Connection Pipes
These are to connect the outdoor condenser unit to the internal coil system.
Electrical Wirings
Needed to maintain or establish a new electrical connection for the AC unit.
Duct Tapes
For various fastening needs during the installation process.
Remember that a big part of success in this type of project comes from preparation. Ensuring you have all the right tools and materials on hand before you get started will help things go much more smoothly. With a clear purpose and the right preparation, replacing your central AC can be a manageable DIY project.
Crucial Safety Precautions to Observe During AC Replacement
Always Prioritize Personal Safety
It’s paramount during AC Replacement to strictly adhere to safety measures for both personal protection and the longevity of your unit. First things first, keep electricity in check; ensure that the circuit breakers and disconnects are switched off to avoid electrical shocks. It is also advisable to use insulated tools during the procedure. Additionally, don’t forget to wear protective gear including gloves, safety goggles and sturdy footwear. Dropping heavy parts or encountering sharp edges during the replacement process can lead to significant injuries. Moreover, stable footing helps avoid accidental slips or falls when handling the unit.
Precaution
Effect
Turning off circuit breakers
Prevents electrical shocks
Wearing safety goggles
Protects eyes from accidental debris
Using sturdy footwear
Prevents injuries from dropped parts or slips
Paying Attention to the Environment
It’s also crucial to assess the working environment. Always replace your AC in a well-ventilated area. Avoid confined spaces with poor airflow, this will ensure the refrigerant gases, if accidentally released, aren’t concentrated in a small area, potentially causing health hazards. Consider also the ground area. It needs to be level to keep the unit stable during installation. Do not forget weather conditions as well; never operate on a windy or rainy day to avoid electrical faults or malfunctions.
Action
Benefit
Working in a well-ventilated area
Avoids concentration of harmful refrigerant gases
Making sure the ground is level
Keeps the unit stable during installation
Avoiding bad weather
Prevents electrical faults or malfunctions
Complete Guide to Removing the Old Central AC Unit
When your Central AC is no longer operating as it should, it’s time for an upgrade. However, professional replacement costs can send your HVAC budget through the roof. Don’t worry! This comprehensive guide will walk you through removing your old central AC unit as part of your do-it-yourself AC replacement project. Let’s get started with the dismantling steps, which are pretty straightforward if followed correctly.
Before You Start
Turn off the Power: Ensure your safety by turning off all power to the AC unit at the breaker box.
Wear Protective Clothing: Safety gloves, eye protection, and work boots are recommended.
Gather Your Tools: You’ll need a wrench, screwdriver, wire cutter, and a disposal unit for refrigerant.
Begin by identifying and disconnecting the electrical lines and refrigerant tubing. To do this, locate your AC’s condenser unit (typically an outdoor unit). Disconnect the electrical line at the disconnect box and refrigerant lines where they enter the condenser. Remember to safely discharge and dispose of the refrigerant in an environmentally-friendly manner. Next, remove the bolts holding the AC unit into place.
Final Steps
Prepare the Area: Clear your work area of any debris or potential obstacles.
Remove the AC Unit: With the help of an assistant, lift and move your AC unit away from the installation area. Be careful not to damage the lines connected to your house while moving the unit.
Cap off Lines: Use refrigerant caps to seal off the refrigerant lines to avoid leakage.
With these steps, you should have successfully removed your old central AC unit in readiness for your replacement. Take your time and remember, safety is always a priority during DIY projects.
Tools Required
Steps
Precautions
Wrench, Screwdriver, Wire Cutter, Disposal Unit
Identification and disconnection of electrical lines, Removal of bolts
Wear protective clothing, Turn off power, Dispose of refrigerant safely
Move the AC Unit, Cap off lines
Clear and prepare your work area
Expert-Approved Steps to Installing the New Central AC System
Whether you’re an ambitious DIY enthusiast seeking to challenge yourself or simply looking to save some bucks, doing your own central AC replacement can be a satisfying and cost-effective endeavor. Of course, it’s a job that calls for a certain level of technical knowledge and practical skills. Hence, it’s crucial to follow some **expert-approved steps**.
Before you venture into the installation, you should familiarize yourself with the basics of a central AC system. Essentially, it comprises two main components: the evaporator coil, typically located above the furnace in the plenum, and the compressor or condenser, generally positioned outside the house. Your installation process will involve dealing with these two main units along with the refrigerant lines that connect them.
Right Product Selection:Start by selecting the most appropriate AC system for your home. This involves taking into consideration factors like the size of your home, the local climate, energy efficiency, and your budget. Keep in mind that a unit that is either too large or too small won’t function optimally.
Safety Precautions: Safety should always be your top priority. Make sure to properly shut off the power to the old unit before you start any work and position the outdoor unit on a solid, level surface.
Evaporator Coil: The first physical installation step involves replacing the old evaporator coil with a new one. Carefully slide the new coil in place and connect the refrigerant lines.
Compressor Unit: Now it’s time to install the outdoor unit. Position it correctly, then connect the power and refrigerant lines.
Remember, these are just the most basic steps. The process can become a lot more detailed and complex depending on the specific make and model of your system. Take your time, don’t rush, and don’t hesitate to call in a professional if necessary. And always remember to perform a test run before re-powering your entire system!
Here’s a simple table to further illustrate some of the steps you need to follow, focusing on which components are involved:
Step
Component
Additional Instructions
Product Selection
Entire System
Consider size, climate, efficiency, and budget
Safety Precautions
Ongoing
Always shut off the power before starting work
Evaporator Coil
Indoor unit
Slide in place and connect refrigerant lines
Compressor Unit
Outdoor unit
Position correctly and connect power and refrigerant lines
Mastering the Fine-Tuning: Testing and Troubleshooting the New AC System
Taking up the challenge of DIY central AC replacement? It’s time to dive into the crucial phase of testing and troubleshooting the new AC system. Even with a flawless installation, this step ensures the AC functions efficiently. Your dedication at this stage can help you avoid frequent costly repairs and elongate the lifespan of your AC.
After the installation process, your first task is to test the system. Turn on the AC and methodically go through each room to check whether the temperature drops evenly. Pay heed to even the slightest variation in cooling since it could indicate a duct leak or a blockage. Now, listen carefully to the sounds emanating from the unit. A functioning system hums along with occasional clicks, and if you notice banging, clattering or rumbling noise, the fault may lie within the motor or the blower assembly.
Troubleshooting Common AC Issues
In case you run into problems post-installation, don’t panic! Troubleshooting common issues can be simpler than you might think. For instance, if the AC is not starting, start by checking if your circuit breakers are tripped. Remember to give it a five-minute gap before you restart. If your AC is still unresponsive post this, you may want to look for a faulty capacitor or a motor malfunction.
Another common issue is inadequate cooling. If you’re facing this, inspect the filters first – often a clogged filter could be the culprit. If they’re clean, your AC might be low on refrigerant, which is a more complex problem and may require professional assistance. The troubleshooting phase can indeed be time-consuming but it allows you to create an optimal environment for your AC to function.
Issues
Solution
AC not starting
Check circuit breakers, Capacitor, Motor
Inadequate cooling
Clean Filters, Check Refrigerant
By investing energy and time now in testing and troubleshooting, you ensure a well-functioning, durable AC system that should keep you cool for years to come.
Key Takeaways
In conclusion, it’s clear to see that while replacing a central AC may seem like a daunting task, with the right tools, knowledge and a good amount of patience, it’s definitely achievable. Even if you’re a novice DIYer, this guide can help you gain the expertise you need to handle your AC woes with confidence. Remember, the key to mastering this seemingly intricate task lies in understanding the basics, having a methodical plan, strictly adhering to safety measures, and not hesitating to seek professional help when needed. After all, the goal is to ensure you have an efficiently working air conditioning system. Hopefully, this guide has taken the mystery out of central AC replacement and given you a better understanding of what to expect. Be brave, be patient and most importantly, keep learning – the world of DIY awaits you!
Hi my name is Angel Muro I established Comfort Time Heating & Cooling driven by my deep passion for HVAC and a sincere commitment to improving our customers' comfort. My initial fascination with plumbing, heating, and air conditioning systems has evolved into a dedicated profession, emphasizing the significance of both technical expertise and a warm, customer-centric approach. This blog aims to provide valuable insights and information. While some pages provide details about our services, my primary goal is to share real-life experiences that can assist you in various HVAC matters.
Have A Plumbing, Heating Or Air Conditioning Project & You Can Us Our Help?
Comfort Time Plumbing Heating & Cooling Servicing Southern California
At Comfort Time Plumbing Heating and Cooling, we are your trusted HVAC & Plumbing experts serving Southern California. With years of experience in the industry, we take pride in delivering top-notch heating and cooling solutions tailored to the unique climate and needs of the region. Whether you're in the coastal areas, inland valleys, or urban centers, our team of dedicated professionals is here to ensure your year-round comfort. We stay up-to-date with the latest technologies to offer energy-efficient solutions, and our commitment to customer satisfaction means you can rely on us for prompt and reliable service. When it comes to your HVAC needs in Southern California, Comfort Time is the name you can trust.