Welcome everyone! Today’s engaging post provides expert insights on a common household issue - noisy water pipes. We have compiled some effective, tried-and-tested tips to silence those bothersome sounds reverberating throughout your house. This post is essentially a guide, backed by professional plumbers’ advice, to help you identify the causes behind the racket your pipes might produce and measures to neutralize it. Packed with practical and easily implementable solutions, it aims to render your home a more peaceful place. Read on to arm yourself with information that can transform your DIY plumbing skills and spare you expensive professional help.
Understanding the Reasons for Noisy Water Pipes
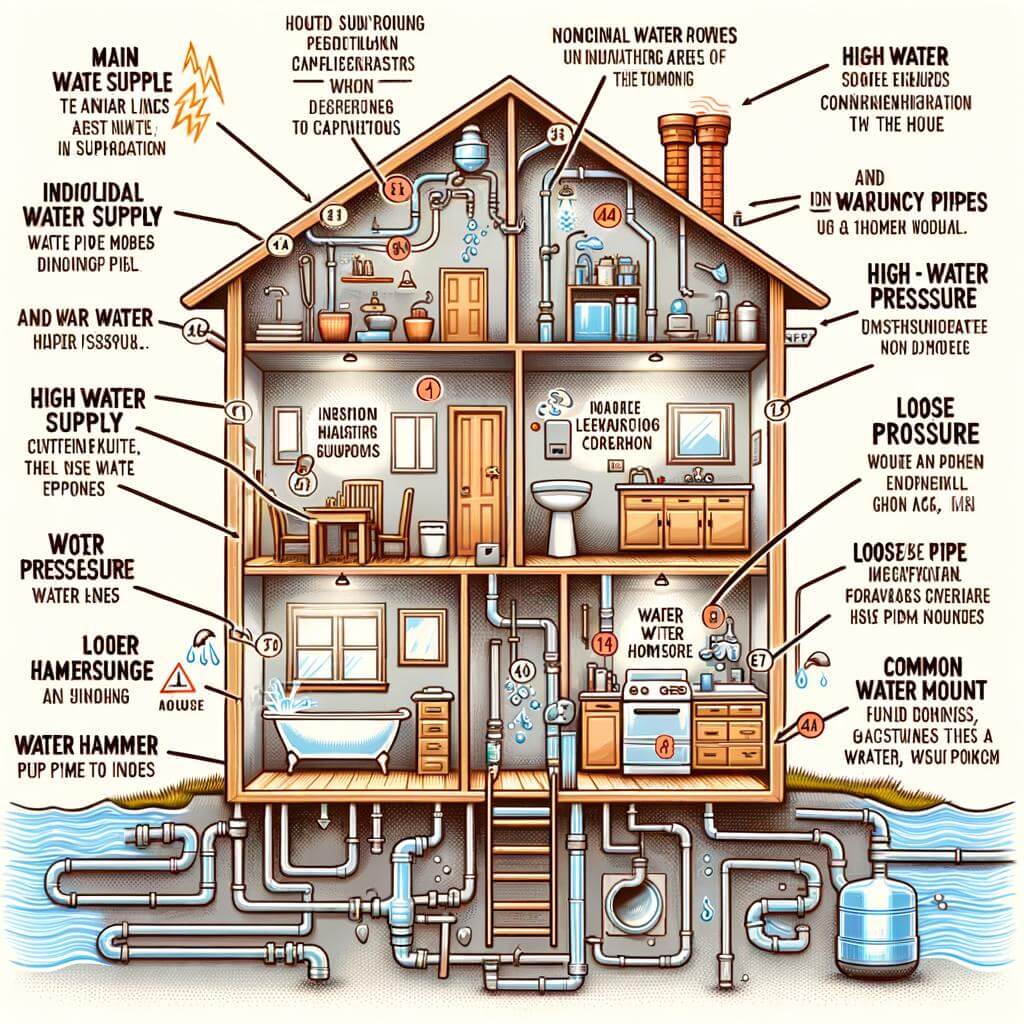
Why are your water pipes making that unbearable noise? This undesirable symphony usually kicks in when you turn off the water suddenly or if the running water inside the pipes is too fast. It’s not only disturbing, but it could also indicate a bigger plumbing issue waiting to happen. Let’s break down the main reasons that could cause your water pipes to make so much noise.
High water pressure: One common cause for noisy water pipes is overly high water pressure. If your water pressure is beyond 80 psi, the rushing water’s velocity can cause turbulence and vibration, which leads to all that noise. A pressure reducing valve could come in handy in this case. It balances water pressure, keeping it within the safe and quiet range.
Loose Pipes: Another probable reason it seems like someone’s knocking on your pipes is that the pipes are loose or not properly secured. When water flows through them at high speeds, they might shake against the walls and each other, causing a clatter. Inspect your pipes and if you notice any loose ones, just fasten them.
Air in the Pipes: They say air is light, but when its bubbles get into your pipes, they can actually cause quite heavy noise. The air causes water to crash around in the pipes, creating banging or hammering sounds. You can get rid of this air by turning on all your faucets and letting the water run until it flows smoothly without any bubbles.
Valve or Washer Issues: If you only hear the noise when you turn off a particular faucet, the culprit might be a defective valve or washer. In these instances, replacing the problematic parts can bring peace back into your home.
Remember that while these fixes can mitigate or eliminate pipe noise, it’s also vital to identify and understand the root cause of the noise. Prolonged water hammering can damage your pipes, eventually leading to leaks or bursts. Thus, it’s advisable to call a plumbing professional if you can’t solve the problem yourself or if it persists after your efforts.
Addressing High Water Pressure Problems at Home
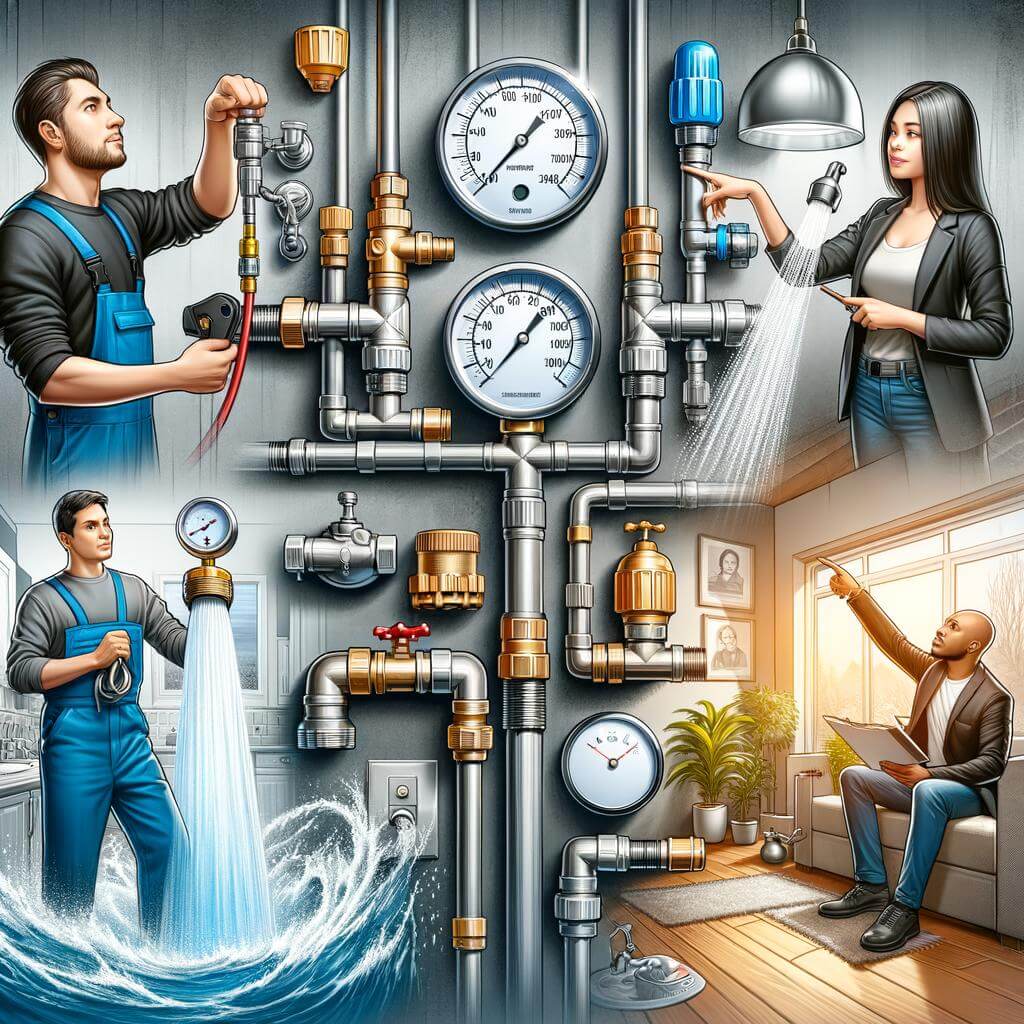
High water pressure in your home can indeed cause your pipes to become noisy, among other issues such as pipe leaks, and fixtures damage. Few steps can be initiated to address this situation. Initially, check whether the water pressure is genuinely high or not. An ideal residential water pressure should be in a range of 45-55 psi (pounds per square inch). You can use a pressure gauge for this. If the water pressure is higher than 60 psi, then it needs to be addressed.
The process of reducing high water pressure involves installation of a pressure reducing valve (PRV) which can be done by a professional plumber. However, if you decide to install it on your own, below are a few steps you can follow:
Step 1: Turn off the water supply.
Step 2: Cut a section of the mai water pipe, place the valve into the pipe and screw it tightly into place.
Step 3: Now, turn the screw on the valve to adjust the pressure.
This will reduce the water flow and subsequently, the noise from the pipes.
Issue
Common Cause
Solution
Noisy water pipes
High water pressure
Install pressure reducing valve (PRV)
However, if the noise continues even after reducing the pressure, then it might be possible that there are air bubbles trapped in your pipes. In such situations, you can flush the entire system or use a plumber’s snake to remove the bit of air and stop the noise. Remember, it’s always better to seek professional help if you are uncertain about handling plumbing issues. High water pressure is not a minor issue and needs to be taken seriously as it can cause severe damage to your home’s plumbing system.
The Importance of Mounting Pipes Correctly to Reduce Noise
Proper installation and secure mounting of your water pipes are critical components to effectively minimizing any unwanted noise within your home. This is typically caused by various factors such as high water pressure, loose pipes, and even the velocity of the water itself. By investing time in ensuring that your pipes are installed correctly, you can significantly reduce their potential for rubbing against other surfaces and causing disruptive sounds.
Secure Loose Pipes: If the pipes are not stabilized and they move around when water is flowing, they can produce knocking or ticking sounds. Inspect your pipes and fasten any loose sections to the wall or floor using pipe clamps. Make sure they are snug, but not too tight, as over tightening could lead to damage.
Install Water Hammer Arrestors: These devices absorb the shock of water hammer, a common cause for noisy pipes. They can be installed on the water line near the source of the noise.
Lower the Water Pressure: High water pressure can cause pipes to vibrate and generate noise. You can reduce water pressure by adjusting the pressure reducing valve, typically located near the water meter.
Quick Tips to Quiet Noisy Pipes
Action
Benefit
Secure Loose Pipes
Prevents movement and associated noise
Install Water Hammer Arrestors
Absorbs shock from water flow, reducing noise
Lower the Water Pressure
Reduces vibration and noise from high-pressure water flow
Remember, if the noise persists after trying these strategies, it may be best to consult with a professional plumber. Often, the issue could be rooted in more complicated problems within your plumbing system that require a more technical approach.
Fixing Loose Pipes: Practical Steps to take
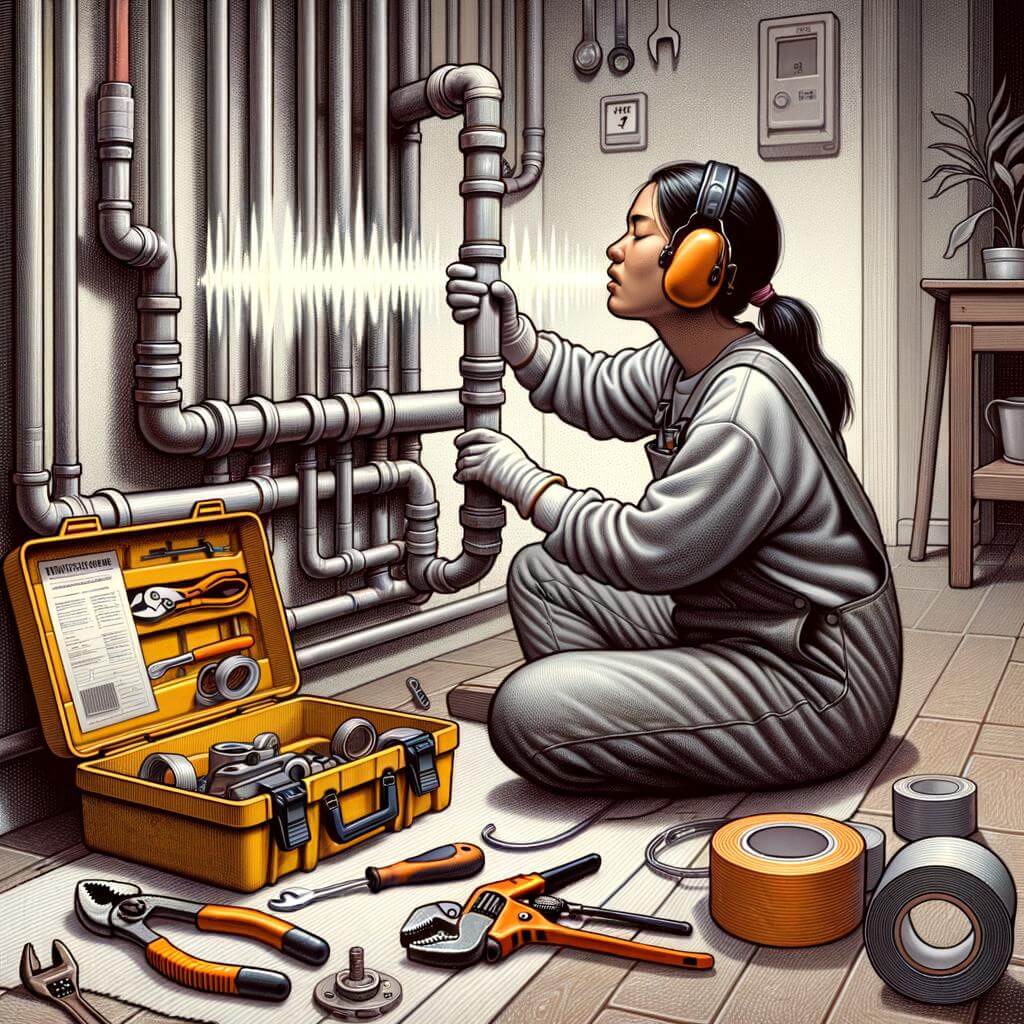
One of the most common causes of noisy water pipes in the home is the loosening over time. But don’t worry – there’s no need to call a plumber just yet. With the right tools and a little spare time, you can quickly fix those annoying sounds.
Firstly, you need to locate the loose pipe. Start by turning on the faucet that’s causing the noise, then touch each pipe along its path to see if any are vibrating. Once you’ve found it, here’s how to sort it out:
For minor shifts: Simply re-tightening the brackets supporting the pipe can fix moderate shifting. Carefully tighten the screws on the brackets with a screwdriver. Make sure you don’t overtighten!
For major shifts: If the pipe has shifted substantially and is causing constant noise, you might need to add new brackets. They’re widely available in hardware stores, and their installation requires no professional help. Choose the correct size for your pipe, mark the spot for installation, drill holes and then screw the brackets in place.
Using padding:Sometimes, pipes vibrate because they come into contact with other pipes, walls, or surfaces. Try wrapping a piece of rubber around the pipe where it’s making contact. This should cushion the vibration and reduce the noise.
Following these steps can significantly help to alleviate the noise from loose pipes. However, remember that not all noise is caused by loose pipes - it can also be a sign of problems like high water pressure, clogged vents or worn out washer valves. For such issues, it’s always recommended to get professional help.
Using the following table as a guide, you can determine what may be causing your noisy pipes and the potential solutions:
Issue
Possible Cause
Solution
Noise when the tap is on
Loose pipes or high water pressure
Fix loose pipes or install a pressure reducing valve
Noise when the tap is off
Water trapped in the pipe
Drain and refill your pipes
Rumbling or vibrating noise
Pipes hitting against wall or each other
Add padding or distance between pipes and wall
Expert Guide to Using Water Hammer Arrestors
Understanding Water Hammer Arrestors
A water hammer arrestor is a crucial plumbing device which prevents noisy water pipes at home – a disturbance often caused by ‘water hammer’. Water hammer results from a sudden stoppage of water flow, creating a pressure wave within the pipe, leading to the familiar hammering or banging sounds. A water hammer arrestor, equipped with an air-filled chamber, absorbs this pressure wave and nullifies the resultant noise. The two key elements of a water hammer arrestor are:
The sealed air chamber which counteracts the sudden change in water velocity.
The piston or moving component which prevents air from being lost in the water stream.
Expert Tips on Installing and Maintaining Water Hammer Arrestors
For effective usage and longevity of a water hammer arrestor, careful installation and routine maintenance are essential. Always ensure to install the arrestor close to the valve or faucet causing the water hammer. Most plumbing codes require arrestors to be situated within six feet of the valve. Here, using soldering or threaded connections is preferred over compression fittings for a secure fit. For maintenance, regular inspection every six months to one year is a must. Check for any water leakage, air loss, or component damage. Depending on the model of the arrestor, periodic recharging of the air chamber might be necessary.
Regular Inspection Frequency
Every 6 months to 1 year
Installation Position
Within 6 feet of the valve
Maintenence Task
Check for leaks, air loss, or damage
Adopting these expert-tips can ensure a peaceful and quiet home, untroubled by the disturbance of noisy water pipes.
Insulating Household Pipes to Minimize Noises
Dealing with noise from household water pipes can be both disruptive and annoying. However, by using some practical methods, it’s possible to insulate these pipes and effectively minimize noise. One effective way to tackle this issue is by wrapping the pipes in insulation materials designed specially for this purpose. These materials not only help in reducing the noise but also save your energy costs by preventing heat loss. The two commonly used insulation materials include fiberglass pipe wrap and plastic foam pipe insulation.
The use of fiberglass wrap involves wrapping this thick material around the noisy pipes, adhesive side towards the pipe. The thickness helps in significantly reducing the sound. On the other hand, plastic foam insulation is a tube-like material which can be easily slid over the pipe and secured in place. Both of these options are cost-effective and can be easily found at your local hardware stores. Here is a simple comparison between the two:
Fiberglass Pipe Wrap
Plastic Foam Pipe Insulation
Installation
Wrapping around pipes
Sliding over pipes
Cost
Relatively cheaper
Slightly more expensive
Ease of Use
Requires more effort in installation
Simpler and quicker to install
In conclusion, effective insulation is a viable solution to minimize noises coming from household pipes. The method you choose ultimately depends on your personal preference, availability, and budget.
Resolving Noisy Pipes with Professional Plumbing Services
Noisy pipes can become an irritating background soundtrack to your daily life, making even the simplest tasks seem like a hassle. Fear not! With professional plumbing services, you can easily resolve these issues, restoring peace and tranquility to your living space. Let’s explore some tried and tested methods employed by professionals to silence those noisy water pipes.
One of the most common methods offered by professional plumbing services is water pressure adjustment. High water pressure can often cause pipes to rattle or make a loud hammering sound. A qualified plumber will assess your system’s pressure and adjust it as necessary to minimize noise. Water hammer arrestors are also a useful solution, specially designed to absorb the shock of water and halt the impact that causes unwanted noise.
Proper insulation is another trick in the toolbox of professionals. It not only reduces noise but also enhances energy efficiency. Insulating materials muffles the noise of water traveling through pipes. Lastly, pipe securement is a simple yet effective solution. Loose pipes can move and cause noise when water flows through them. Hence, professional plumbers make sure that all pipes are securely attached to walls, floor joists, and ceilings.
Service
Description
Water pressure adjustment
Assessment of system’s pressure and adjustment to reduce noise
Water hammer arrestors
Devices designed to absorb the shock of water and reduce noise
Proper insulation
Reduces noise and enhances energy efficient
Pipe securement
Ensuring all pipes are securely attached to reducing movement
Oftentimes, homeowners consider noisy pipes a minor annoyance and tend to overlook them. However, the persistent noise can sometimes indicate a deeper issue that may require immediate attention. By availing of professional plumbing services, one can not only silence the disruptive noises but also ensure the overall health of your plumbing system.
Key Takeaways
In conclusion, dealing with noisy water pipes at home can be an annoying experience, but utilizing these expert-approved methods can offer much-needed relief. From simply securing loose pipes to more advanced strategies like installing water hammer arrestors, there’s a solution for all noise levels and circumstances. Remember, it’s always crucial to understand the root cause of the noise before attempting to fix it. And if all else fails, don’t shy away from seeking professional help to diagnose and efficiently quieten your noisome water pipes. You deserve the tranquility and comfort of a noise-free home. With these expert tips at your fingertips, you can now tackle the issue of noisy pipes competently and confidently.
Welcome to our latest post “Mistakes to Avoid: The Risks of DIY Toilet Replacement”. This informative piece aims to educate homeowners about the potential risks and common mistakes involved in a DIY toilet replacement project. Proficiently replacing a toilet requires a deeper understanding of plumbing that many people underestimate. While a DIY approach may save you money initially, improper installations can lead to costly repairs over time. By detailing the most frequent errors, this post will help you discern whether to undertake a toilet replacement by yourself or seek professional help instead. Our expert-backed evidence and practical advice will equip you with the insights needed to make an informed decision. Let’s dive in to navigate these potential pitfalls and ensure the success and safety of your bathroom renovation.
Understanding the Intricacies of DIY Toilet Replacement
DIY toilet replacement can seem like an appealing prospect, especially if you’re looking to save some dollars. However, there are certain risks involved that could end up costing you more money in the long run if not properly addressed. One common error for DIY enthusiasts is not understanding the complexity of their own plumbing system. The standard gravity-flush toilet may appear simple but it has a number of intricate components that need to be properly fitted and sealed. Mistakes in installation can not only damage the new toilet but also disrupt your home’s plumbing and drainage system.
Misjudging your DIY skill-level is another common mistake. A DIY toilet replacement project is not a suitable task for beginners. Basic knowledge of plumbing is a prerequisite, including understanding different types of pipes, knowing how to turn off your water, and being able to seal and fixture pipes. In addition, the right tools are necessary. Using incorrect or inadequate tools can lead to shoddy work and potential problems in the future. Here’s a table listing some essential tools and supplies needed for a DIY toilet replacement project:
Essential Tools and Supplies
Adjustable wrench
Plunger
Sponge and bucket
New toilet and attachments (bolts, seals, wax ring)
Lastly, not knowing when to call a professional is perhaps the biggest pitfall. If a project begins to feel overwhelming, it’s okay to step back and call a licensed plumber. The cost of fixing a botched DIY job could end up being much more than the price of hiring a professional from the start. So while DIY toilet replacement could be a rewarding learning experience, always remember the importance of research, preparedness, and knowing when to call for assistance.
Recognizing Common Pitfalls in Home Toilet Installation
Navigating the treacherous waters of home toilet installation can be like walking a tightrope. One wrong move, and you’re in for a messy situation. Fortunately, avoiding the most common pitfalls in this DIY project isn’t too complicated, it just takes a little knowledge and preparation.
Improper Sealing: One of the most common errors made by novices is failing to seal the toilet bowl and tank correctly. This could lead to water leaks that can cause serious damage to your bathroom floor. Getting the right seal requires using a high-quality wax ring to seal the base of the toilet. Also, employing a flexible supply line is generally easier to install and less prone to leaks. To prevent future issues, you can check for leaks right after installing the toilet and again after a few days of use.
Common Pitfall
Prevention Tip
Improper Sealing
Use a high-quality wax ring and check for leaks after installation.
Incorrect Leveling: An improperly leveled toilet can lead to an unstable fixture, thereby causing discomfort and eventually breaking. Combined with loose bolts, it can also cause an imbalanced bowl, leading to water spillage and potential water damage. Be sure to use shims to balance the toilet bowl, examine the level, and tighten the bolts properly after installment.
Common Pitfall
Prevention Tip
Incorrect Leveling
Use shims for balancing, examine the level and properly tighten the bolts.
Remember, patience and careful preparation when dealing with home toilet installation is paramount. Ensure you have the correct tools, spare parts, and enough time to get the job done well, to avoid these common pitfalls.
Addressing the Real Dangers Involved in Do it Yourself Toilet Replacements
DIY projects can be incredibly rewarding, and many homeowners find that replacing a toilet is within their scope of ability. However, it’s important to approach such a task armed with knowledge and a healthy respect for potential challenges. Several hazards come with a DIY toilet replacement that could end up costing you more than the savings you might make by doing it yourself.
The first is the risk of water damage. An incorrectly installed toilet can lead to water leaks, which can damage your floor, subfloor, and even the ceiling below. This can lead to potential mold problems and structural harm to your house.
Incorrect removal of the old toilet: Failure to shut off and drain the water fully from the old toilet could lead to serious water damage.
Wrong installation: If the new toilet isn’t sealed correctly around the base, it can leak each time it’s used.
Over-tightening: This is a common mistake, often leading to cracked porcelain that will cause leaks.
The other major issue homeowners often run into is sewer gas leaks. If the wax ring seal or the flange isn’t installed correctly, harmful sewer gases can potentially leak into your home.
Mistake
Potential Damage
Uneven toilet base
Leaking, rocky toilet
Incorrect wax ring placement
Sewer gas leakage, water leakage
Damaged flange
Sewer gas leakage, toilet instability
Neither water nor sewer gas leaks are problems to be taken lightly. Both can harm the health of your home and your family. If you’re considering a DIY toilet replacement, make sure you have a good understanding of what the process entails and are prepared to handle those complications should they arise.
Tips from Industry Experts on Toilet Installation
Installing a new toilet can seem like a straightforward task at first glance, but there are a lot of subtle nuances and prerequisites to keep in mind to ensure that things go smoothly. DIY toilet replacement errors can result in leakage, blockage, or, worse, structural damage in your property. Here are a few common pitfalls to watch out for.
Poor Wax Ring Installation: If you fail to sit the toilet properly on the wax ring, or if the ring itself isn’t properly sized, it can cause leaks. Professionals recommend you always ensure the ring is in the correct position, and don’t hesitate to use a thicker one if needed.
Incorrect Flange Position: The toilet flange should always be a quarter-inch above the finished floor level. If it is too low or too high, it can lead to leaks or prevent the toilet from securing properly.
Forgetting to Check the Level: Always check whether your toilet is level before finalizing the install. An unlevel toilet can make the installation unstable, and further, can cause operation issues.
Error and Its Risk
Recommended Solution by Industry Experts
Poor Wax Ring Installation – Potential Leakages
Use a properly sized and correctly positioned wax ring
Incorrect Flange Position – Leakage or Insecurity
Ensure the flange is 1/4-inch above the finished floor level
Unchecked Level – Instability or Operation Issues
Always check the toilet’s level post installation
Replacing a toilet can be a DIY project, but it’s not advisable for everyone. If you’re not sure, it’s better to be safe than sorry and hire a professional. They can provide expert level services and take care of the challenging parts, while you can relax, knowing your new toilet will function perfectly without risking any major mishaps.
Adopting Best Practices in Bathroom Renovation Projects
Embracing a do-it-yourself mentality can often lead to cost-efficient and personalized results. However, when it comes to renovating key areas of your home such as the bathroom, it’s crucial to understand that mishandled projects can lead to dire consequences including leaks and structural damage. Top amongst these risky endeavours is DIY toilet replacement. So, let’s explore some common mistakes people make and how to avoid them.
A Lapse in Measurement is the first issue you could face. It’s essential to understand that not all toilets have the same dimensions. Buying a toilet that doesn’t match the size of the existing space could result in unwanted additional costs of returning, reordering, and time wasted. On the other hand, a Sloppy Installation is another common pitfall. The installation process is more complex than it may seem and requires precision and expertise. The base should be level; the seals should be tight, and the tank should be carefully aligned with the bowl.
Mistake
Impact
Prevention
Incorrect measurements
Additional costs and timeline delays
Ensure accurate measurements before purchase
Sloppy installation
Potential leaks, structural damage
Ensure precision during setup or hire a professional
To mitigate these issues, consider creating a clear, detailed plan of action, and don’t shy away from enlisting the help of professionals if steps start to seem too complex or time-consuming. Additionally, you should invest in high-quality materials. It may seem cost-efficient to skimp on these, but this could lead to more expenses down the line when cheap parts need to be replaced. Remember, a well-executed bathroom renovation can elevate comfort, boost aesthetics, and increase property value.
The Financial Implications of a Faulty Toilet Replacement
While a DIY toilet replacement may seem like a cost-effective and satisfying home project, it can often lead to unexpected financial implications if not done correctly. One major concern is unintentional water damage. A faulty installment can potentially cause leaks which can increase water bills, cause structural damage, and even lead to mold growth, significantly hiking up the replacement cost. In worse case scenarios, a homeowner’s insurance may not cover the cost of repairs if it’s concluded that the damage was due to improper DIY work.
Apart from this, non-compliance with local plumbing codes can also fetch you hefty fines. Often these codes require certain standards or permits when installing or replacing major fixtures like toilets. Though these regulations might seem tedious, they exist to ensure safety and prevent potential problems. Doing the job yourself without understanding or complying with these standards can cost you more in the long run.
Financial Implications: Increased water bills, home repair costs
Regulatory Penalties: Fines for non-compliance with local plumbing codes
Risk Factor
Potential Expense
Water Damage
$1,000 – $4,000
Mold Remediation
$500 - $6,000
Non-compliance Fines
Varies by county
Ultimately, it’s crucial to weigh the initial savings of a DIY project against the potential costs and consequences of a faulty toilet replacement. You might find that hiring a professional plumber for proper installation is financially safer and less stressful in the long run.
Why Leaving Toilet Replacement to Professionals Could Save You Stress and Money
When it comes to home improvement, DIY projects can be incredibly satisfying and financially rewarding. But when it comes to replacing a toilet – a task that might seem simple and straightforward, the risks often outweigh the benefits. Dealing with a delicate system like a toilet can be complex, and it’s not hard to understand why; it’s made up of numerous intricate parts, each crucial to it running smoothly, and mishandling even one of these parts can lead to disaster.
Toilet replacement tends to involve tasks such as correctly fitting the wax ring, properly securing the toilet to the floor, and ensuring that the water supply is safely and accurately reconnected—all jobs that involve a sizable amount of expertise. Failing to carry these out correctly can inevitably lead to leaks, water damage, or even the horrifying possibility of sewer gases seeping into your home. And believe us when we say this: the expenses involved with fixing these secondary issues will far outweigh the money you initially saved by going the DIY route. Below, we’ve put together a table to give you a snapshot of some common, but costly, DIY toilet replacement mistakes:
DIY Mistake
Possible Consequence
Improper installation of wax ring
Leakages leading to water damage
Poor securement of toilet to floor
Instability that could lead to breakages
Mishandled water supply reconnection
Water leakages and increased utility bills
By employing a professional to carry out your toilet replacement, you’re not just buying their labor; you’re also investing in their expertise, their guarantee, and your peace of mind. Professionals will have the right tools, the correct parts, and the necessary experience to complete the job swiftly, efficiently, and without costly mistakes. Going down the professional route may seem more expensive upfront, but it can save you a significant amount in the long run. DIY seems enticing, we admit, but always remember: when it comes to toilet replacement, it pays to call in the experts!
Closing Remarks
In conclusion, while DIY toilet replacement can seem like a great way to save some money, it’s important to tread carefully. The risks–including damaging your home’s infrastructure, causing water leaks or installing the toilet improperly–can result in greater expenses down the line. As we’ve discussed, these are mistakes best avoided. Always remember, when in doubt, seek the expertise of a professional plumber. Through informed decisions and measured actions, you can maintain a functional, efficient, and safe restroom for your home. Our hope is that this article has shed light on some common pitfalls in the DIY toilet replacement process, and will help guide you towards the right choices for your home maintenance needs.
Welcome to our latest comprehensive guide, “Effective Solutions to Reduce Loud AC System Air Vents”. This post is designed to help you understand the causes of those irritating loud noises coming from your AC vents and the measures you can take to minimize them. Here, we offer well-researched, practical solutions backed by expert opinions that can prove beneficial in alleviating this common problem. By following the tips and directions in this post, you can not only reduce the noise your vents emit, but also improve your household’s comfort and AC system’s longevity. The methods we’ll explore are simple, cost-effective, and easy to implement, making this guide a must-read for anyone looking to enjoy a quieter and smoother running AC system.
Understanding the Causes of Loud AC System Air Vents
The root causes of loud airflow from your AC system vents can be multifaceted. The first potential culprit is an obstructed or restricted airflow, often caused by dirty or clogged filters. Regularly replacing or cleaning your filters can mitigate this issue. Similarly, a blocked return vent can create forceful air pressure, generating more noise. Ensure your return vents are clear of any obstruction. Furthermore, a unit that is too large or powerful for your space might produce an excessively strong airflow resulting in louder noise.
Apart from these, the design of your ductwork can also significantly influence the noises produced by your AC system. For instance, extensive or complicated ducts with numerous twists and corners can lead to more turbulent airflow and hence, increased noise. The material of the ducts also matters; flexible ducts are generally quieter, whereas metallic, rectangular ones can produce echoing and banging sounds. Below is a simplified table representation of causes and their respective noise levels:
Cause
Noise Level
Obstructed Airflow
Medium
Blocked Return Vent
Medium to High
Oversized Unit
High
Extensive Ductwork
High
Understanding these causes is the first step towards troubleshooting and ultimately reducing the loud sounds from your AC vents.
Exploring Effects of Noise Pollution from AC Vents
As quiet as they might seem, air conditioning (AC) vents can contribute significantly to noise pollution in our homes, offices, or any indoor space. This is due to the constant hum of airflow, accompanied by occasional rattling or whistling noises. The consistent noise from an AC vent strains your ears and the low-frequency noise can be quite disturbing. This doesn’t just affect your comfort but also poses potential health risks like stress, hearing loss, sleep disturbances, and reduced cognitive performance.
Luckily, there are several effective solutions to reduce the noise coming from AC air vents. Proper insulation is one of the prime solutions. Insulating both the exterior and interior of your air ducts can significantly reduce noise levels. Regular Maintenance is another critical factor. Regularly cleaning and maintaining your AC system ensures it operates smoothly, producing less noise. If the noise is because of loose parts within the vent, securing the loose equipment can help. In severe cases, you might need to replace the noisy AC unit with a newer, quieter model.
Let’s look at some effective solutions to the noise problem in a comprehensive table:
Solution
Benefits
Proper insulation
Significantly reduces noise levels
Regular Maintenance
Ensures smooth operation, less noise
Securing loose equipment
Eliminates rattling or whistling noises
Replace the noisy AC unit
Newer model typically operate quieter
Steps to Diagnose Noise Problems in Your AC System
The first step in diagnosing noise problems in your AC system is determining the nature and source of the noise. Start with general observation. Check whether the noise is constant or intermittent, and note if it occurs only when the system starts up, shuts down, or while it’s running. Once you’ve figured this out, continue to the following steps:
Check the indoor unit: Listen to the patterns and intensities of unusual noises coming from your indoor unit. It can often be an issue with the fan, filters, or coils. If you notice excess vibration, it may indicate loose components.
Inspect the outdoor unit: Unusual buzzes and hums from the outdoor unit may suggest problems with the compressor or fan motor.
Examine the ductwork: If the noise is coming from your ductwork, it might be due to thermal expansion, loose connections, or airflow issues.
Part of the AC
Possible Problem
Identifiable Noise
Indoor Unit
Fan, filter or coil issue
Unusual, intermittent noises
Outdoor Unit
Compressor or motor issue
Regular buzzes or hums
Ductwork
Loose connection or airflow issue
Airflow noises, whistling
In the second step, you should take some basic precautionary measures. To ensure your safety, power off your air conditioner system before conducting a physical examination. This can be done at the breaker box. Once secure, you should:
Inspect your indoor unit – Look for loose parts, dirty or clogged filters, or frozen coils.
Examine your outdoor unit – Check for any physical damage to the unit, blocked fan, or dirt clogging the unit.
Review your ductwork – Search for any visible damage, loose thresholds or tape, and ductwork not properly insulated.
Most minor issues can be solved by cleaning and routine maintenance, but for more complex issues you should reach out to a professional who can effectively diagnose and treat the problem. Noise often indicates that your system is working harder than it should and could result in increased energy costs. Don’t overlook these signs – your AC system’s performance and your comfort might be at stake.
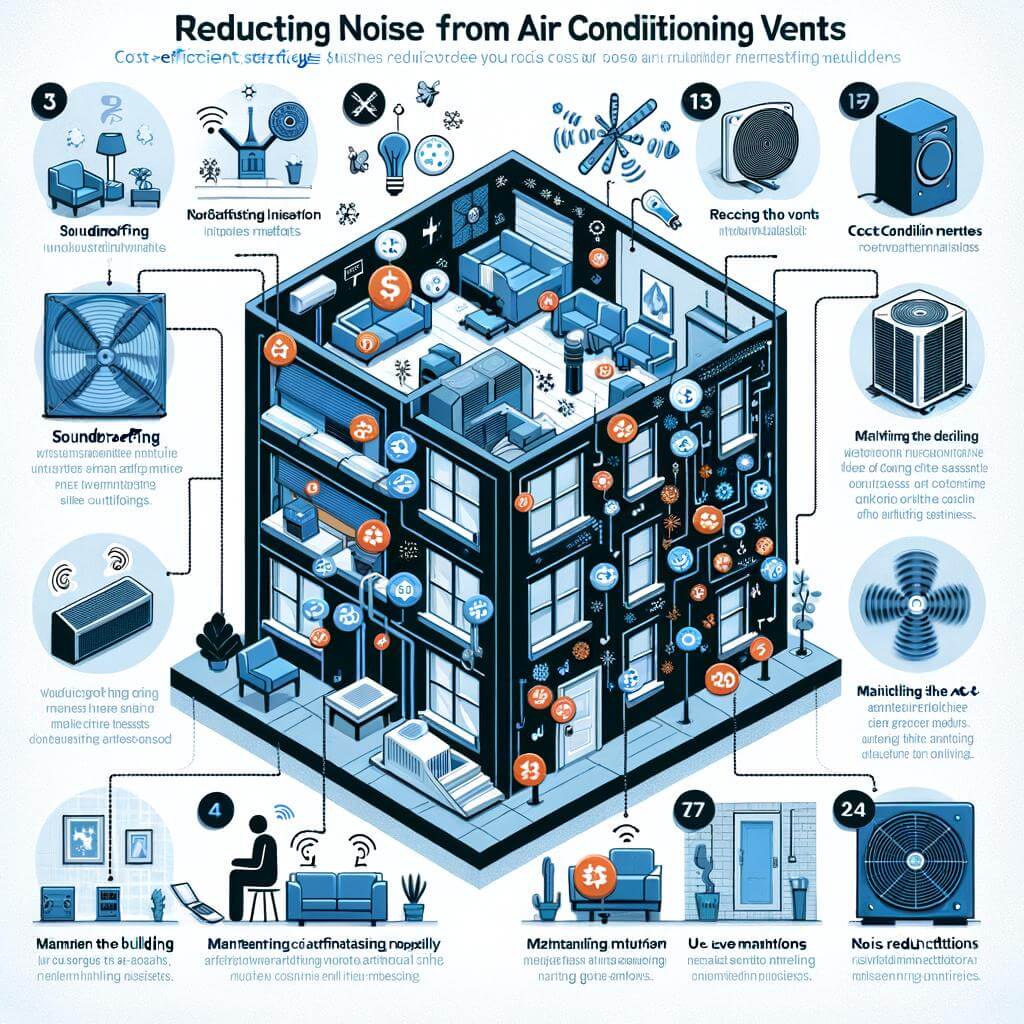
Cost Efficient Strategies to Reduce Noise from Air Conditioning Vents
Keep Debris at Bay
One simple yet highly effective method for reducing noise from your AC system is to ensure the unit and its environs are clean and free from debris. Accumulated leaves, twigs, and dirt can significantly hamper your AC’s operation, often resulting in annoying noises. Regular cleaning is a cost-efficient strategy that can have a huge impact on the running sound level of your AC system. While at it, remember to check and clean your air filters. Dirty filters not only reduce airflow but also cause the system to operate noisily. If necessary, replace them entirely. You can find cost-effective, high-quality filters in most home improvement stores.
Regular Maintenance and Insulation Improvement
The importance of regular maintenance for your AC system cannot be overstated. Over time, some parts of your unit like the fan or motor can develop issues that may lead to increased operational noise. Regular maintenance helps catch these problems early, prevents further damage, and keeps your system running quietly. Another budget-friendly strategy is improving your system’s insulation. Soundproofing the area around your air vents can significantly cut down on the noise.
Cost-Efficient Strategy
Expected Reduction in AC Noise
Regular Cleaning
Moderate
Air Filters Replacement
Low to Moderate
Regular Maintenance
High
Insulation Improvement
High
Note: The effectiveness of these strategies can vary depending on the specific issues with your AC system. It’s best to work with a professional to determine the most appropriate solutions for your home or office.
The world of soundproofing comes with a variety of products and applications that effectively reduce the loud air vent noise from your AC system. Whether it’s a rattling noise, a high-pitched whistle, or a low hum, each problem has a solution that can restore peace and tranquility back into your home or workspace. Moreover, soundproofing can also help in improving the performance of your AC system.
Common soundproofing products include soundproof foam, mass loaded vinyl, soundproof curtains, and anti-vibration pads. These products can be installed in or around the vents of your loud AC system to absorb and block noise. For example, soundproof foam is designed to absorb sound, reducing the noise that passes through it. Meanwhile, the high mass and flexibility of mass-loaded vinyl allow it to block noise. Soundproof curtains offer another layer of noise defense and anti-vibration pads minimize the vibrations that cause noise when your AC system is running.
Product
Application
Effectiveness
Soundproof Foam
Installed around the vents
Absorbs sound to reduce noise
Mass-loaded Vinyl
Fitted in the vent ducts
Blocks noise due to high mass and flexibility
Soundproof Curtains
Hang around the noisy area
Provides an extra layer of noise defense
Anti-Vibration Pads
Placed under the AC unit
Minimizes vibrations that cause noise
Soundproofing your vents can be a process of trial and error, testing out different products and techniques until you find the solution that works best. It’s also best to consult with a professional if you’re unsure about how to best soundproof your space, or if the noise level is becoming too distressing. Always remember, a quieter environment isn’t just more comfortable – it’s also better for your health.
Maintaining Your AC System for Continued Quiet Operation
Given the significant role your air conditioning (AC) system plays in maintaining a comfortable indoor climate, it’s vital to ensure its continued quiet operation. That signature soft hum is a sign of a well-maintained system and it’s likely what you want to hear every time you switch it on. Occasionally, you might come across cases of loud air vents that could indicate various issues with your AC system. The good news is, there are various proactive maintenance steps you can take to help reduce the noise and improve system performance.
The first key step is to regularly change or clean the air filters in your AC system. Dirty filters not only lead to poor air quality but also, create unnecessary strain on the system, which results in louder operation. In general, it’s recommended to change your filter every 2-3 months, or more frequently if used regularly.
Regularly clean outdoor unit: Ensure the outdoor unit is free from dirt, leaves and other debris that can choke up the system, causing it to work harder and louder.
Check for loose parts: Loose parts in the AC system may vibrate and create noise. Check all parts for tightness and secure any loose components.
Proper insulation: Your AC system should be properly insulated to minimize noise transmission. This includes the ductwork, which is often a common source of noise.
Task
Frequency
Filter replacement
Every 2-3 months
Cleaning outdoor unit
Every 6 months
Check for loose parts
Once a year
Ductwork Insulation
Once a year
A professional inspection at least once a year can make a world of difference in maintaining your AC system’s quiet operation. This recognizes and fixes small issues before they become big problems, saving you time, stress, and money. Regular, mindful maintenance is the key to a silent and efficient AC system.
Incorporating Silent AC Solutions into Your Home Design
Air conditioning sounds can be a source of disruption and discomfort at home, but thankfully, there are ways to effectively reduce these noises. There are specific design alterations and choices that can aid in this arena. Firstly, choosing the right AC unit plays a crucial role. Wall-mounted units tend to be less noisy compared to window units. Additionally, ductless mini-split systems which consist of an indoor handling unit and an outdoor compressor are known for their quiet operation.
Another vital aspect is the placement of air vents. Vents should not be placed near areas where you spend most of your time, like bedrooms or living room to limit exposure to noise. Also, using sound-deadening duct board around the air vents can absorb the sound vibration and lower the noise level. Lastly, regular maintenance of your air conditioning system is essential. Cleaning or replacing the filters and routine checks on the machine can prevent it from running hard and creating excessive noise.
AC Solution
Noise Level
Wall-mounted units
Low
Window units
Medium - High
Ductless mini-split systems
Low
Sound-deadening duct board
Can significantly reduce noise
Remember, integrating silent AC solutions doesn’t mean that you have to compromise on the cooling of your house. Balancing the need for a comfortable temperature with a noise level that isn’t disruptive can significantly enhance your quality of life. With thoughtful planning and consideration, your home design can incorporate solutions that provide both cool comfort and tranquil environment. Incorporating these solutions into your home design requires technical knowledge and professional experience, therefore it’s recommended to get in touch with an HVAC professional for seamless installation.
Seeking Professional Help: When to Call an HVAC Expert for Vent Noise Issues
While there are several strategies available for homeowners to mitigate excessive noise coming from their AC system’s air vents, there comes a point where it becomes essential to call in a professional. Recognising when the problem is beyond a simple DIY fix can prevent further damage to your system and potentially expensive repairs.
For instance, if your air vent noise issue persists, despite changing filters and checking for blockages, there may be more serious underlying issues. Such could include a problem with ductwork, imbalanced air pressure, or even a fault in the system’s mechanics. Moreover, if strange smells or unusual sounds accompany the loud vent noise, it is most likely time to seek professional assistance, as these indicate more significant problems. Similarly, if you’ve noticed any change in the system’s efficiency, including uneven cooling or a sudden rise in energy usage, it would highly indicate expert intervention. Some common scenarios where professional help should be involved include:
Inconsistent airflow across the rooms
Loud noises when system is switched off or on
Fluctuation in indoor humidity
Steady increase in electricity bills
In such cases, an HVAC professional can carefully inspect your ventilation system, identify the root of the issue and provide the most effective solution. They have the necessary training and expertise to diagnose the problem accurately, ensuring it doesn’t recur in future.
Final Thoughts
In conclusion, dealing with noisy air vents in your AC system need not be a daunting task. As outlined in this article, various techniques, ranging from simple fixes to more complex solutions, can be employed to considerably reduce the noise levels. By following these expert tips, you can ensure a more peaceful and comfortable living or working environment. Remember, consistent maintenance of your AC equipment is key to preventing unnecessary noise and increasing its lifespan. With strategic planning and professional help when needed, your AC can function efficiently and quietly. Here’s to cool, comfortable and quieter spaces!
Hi my name is Angel Muro I established Comfort Time Heating & Cooling driven by my deep passion for HVAC and a sincere commitment to improving our customers' comfort. My initial fascination with plumbing, heating, and air conditioning systems has evolved into a dedicated profession, emphasizing the significance of both technical expertise and a warm, customer-centric approach. This blog aims to provide valuable insights and information. While some pages provide details about our services, my primary goal is to share real-life experiences that can assist you in various HVAC matters.
Have A Plumbing, Heating Or Air Conditioning Project & You Can Us Our Help?
Comfort Time Plumbing Heating & Cooling Servicing Southern California
At Comfort Time Plumbing Heating and Cooling, we are your trusted HVAC & Plumbing experts serving Southern California. With years of experience in the industry, we take pride in delivering top-notch heating and cooling solutions tailored to the unique climate and needs of the region. Whether you're in the coastal areas, inland valleys, or urban centers, our team of dedicated professionals is here to ensure your year-round comfort. We stay up-to-date with the latest technologies to offer energy-efficient solutions, and our commitment to customer satisfaction means you can rely on us for prompt and reliable service. When it comes to your HVAC needs in Southern California, Comfort Time is the name you can trust.